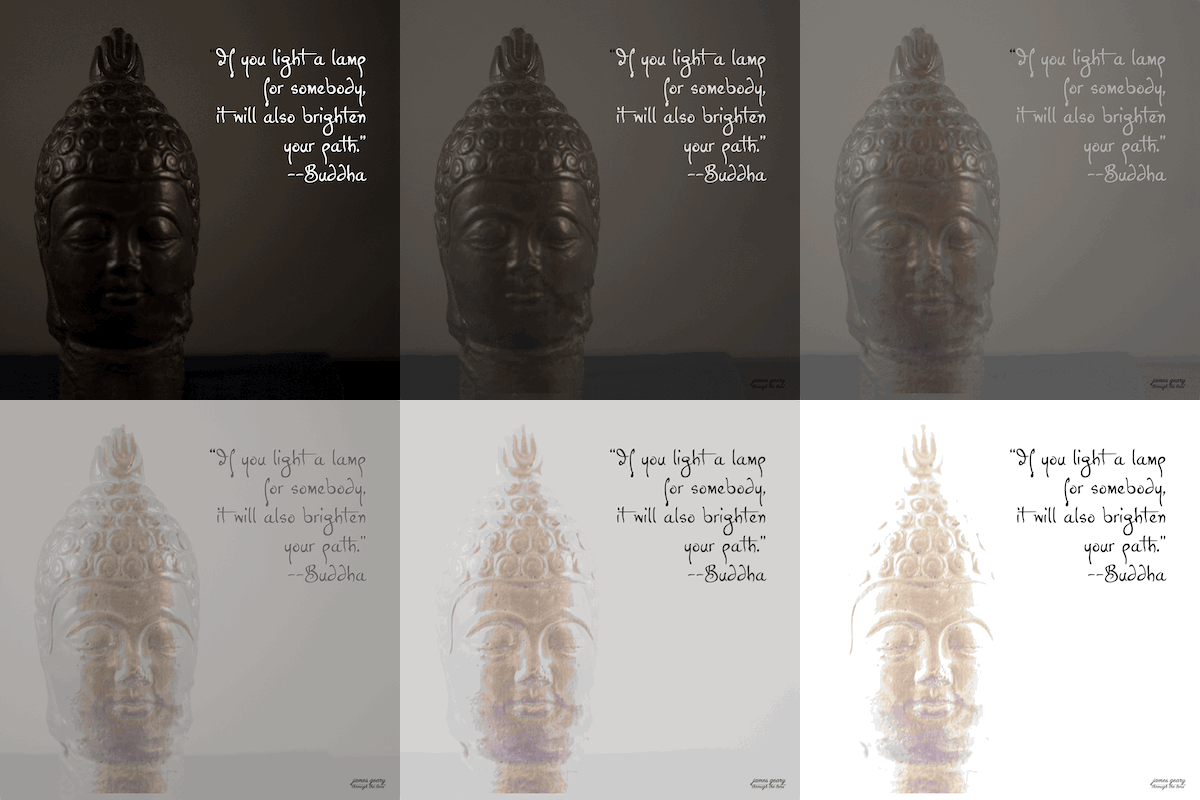
Where I live makes it hard to do the type of photography I normally do. Cold weather and rain are hard for me to work in so I have decided to develop in other areas and ways. I bought a couple of books to help kickstart the creative juices. I’ve started reading them and this my first exercise, if you will. The idea is to work with over and under exposed pictures to create an effect or enhance a mood.
I like this idea of working with different exposures. I tend to make my shots, either when taking them or when processing, on the dark side. Not real sure why except I think it makes the object of the photo standout more. Being stuck in the house due to the weather, I decided to find something here to work with fo this project. I decided to use a Buddha head statue we bought in Baniff, Alberta, Canada a couple of summers ago.
For this project I used my Canon EOS 6D Mark II with an EF100mm macro lens. The setting for the underexposed shot was f/2.8, 1/2500, ISO 12800. The sitting for the overexposed was f/2.8, 30.0. ISO 100. I shot a number of different exposures but these are the two I decided to work with.
My first idea was just to use the overexposed shot, with a Buddha quote. The idea was the Buddha being of the light. The shot had a couple of minor tweaks in Camera Raw but the only thing done in Photoshop was the addition of the text. This is the result.
A day or so later I was wondering if I could use one of the underexposed shots to emphasize the first product. The idea here, of course, is to convey coming from the darkness into the light, or, awakening. I chose the darker shot and did a couple of minor tweaks in Camera Raw. This is the product I had to work with now.
My idea was to take the underexposed shot and use it for a base which would transition to the overexposed shot with the quote. To do this I tried two different methods.
I first one was to use Photoshop. I loaded both shots as layers. I entered the quote in white text on the dark image and as black text on the light image. Since I did the text on different days, I had to align them for the merger.
I then opened the motion workspace. I entered the darker photo and then the light one. I added a transition and saved them as a gif. That picture is the feature pic at the top.
I was thinking to load it to instagram, which I have just stared using, but found I cannot not use a gif there, but I could use movies. This lead me to think of iMovie. I loaded each shot into iMovie and placed them on the timeline. I added a transition and saved it. The result is below.
These were both pretty quicly done and after seeing them I would probably do a couple of thing differently if I was doing this again, but overall I’m happy with the results. I will definitely continue to find other uses for non-typical exposures ,as well as exploring other new ideas.

